


TL;DR:
- Solar panels over seven or eight years old may underperform due to technological advancements in efficiency and system integration. Upgrading involves navigating permitting, utility interconnection, and ensuring equipment compatibility in Oregon and Washington for optimal performance. Partnering with local experts ensures a seamless process, from assessment to post-installation monitoring, safeguarding your investment and maximizing energy output.
Solar panels installed even seven or eight years ago may already be underperforming. Technology has moved significantly since then, and the systems that were considered state of the art in 2015 or 2016 now lag behind in efficiency, monitoring capability, and battery integration. Knowing how to upgrade solar panels means understanding more than which panels to buy. It means navigating permits, utility interconnection rules, and component compatibility specific to Washington and Oregon. This guide walks you through every stage, from legal requirements to post-upgrade performance verification, so your upgraded system works the way it should from day one.
Table of Contents
- How to upgrade solar panels: Permitting and interconnection requirements in Oregon and Washington
- Key components to upgrade: Inverters, panels, and battery storage options
- Preparing for your solar panel upgrade: Site assessment, documentation, and choosing contractors
- Executing your solar upgrade: Installation steps, inspections, and activation
- Verifying performance and optimizing your upgraded solar system
- Why upgrading your solar panel system is a smart investment beyond just adding panels
- Get expert help upgrading your solar system with A&R Solar
- Frequently asked questions
Key Takeaways
| Point | Details |
|---|---|
| Permits required | Upgrading solar panels in Oregon and Washington requires electrical and structural permits plus utility approvals. |
| Upgrade components | Focus on updating inverters, adding panels if possible, and integrating battery storage for best results. |
| Choose contractors wisely | Work with licensed professionals who understand local regulations and incentive programs. |
| Verify performance | Use modern monitoring apps after upgrades to track system health and energy production. |
| Future-proofing | Upgrades often involve modernizing communications hardware to maintain system connectivity and warranties. |
How to upgrade solar panels: Permitting and interconnection requirements in Oregon and Washington
Before any equipment is swapped out or added, you need to clear the legal pathway. Skipping this step is the most common and costly mistake homeowners make. In Oregon, structural and electrical permits are required before you can upgrade or expand a solar system, along with utility interconnection approval. These are not formalities. They protect you legally, ensure your system qualifies for incentives, and confirm your installation meets national standards like the National Electrical Code (NEC) and UL certification requirements.
Washington has its own rules. Net metering systems are governed by RCW 80.60, with a capacity cap of 100 kW per customer. Any upgrade that increases your system’s output must stay within this threshold to remain eligible for net metering credits from your utility. Exceeding it does not just limit your incentives. It can require renegotiating your interconnection agreement entirely.
Here is what the permitting process generally involves in both states:
- Structural permit: Confirms your roof can support any added panels or new equipment
- Electrical permit: Required for any changes to wiring, inverters, or connection points
- Utility interconnection approval: Mandatory before connecting upgraded components to the grid
- Plan review: Utility and city/county reviewers assess the updated system design
Understanding the Oregon solar incentives and Washington solar incentives tied to these upgrades can also affect which permit pathway is most cost-effective for your project.
Pro Tip: Contact your utility’s interconnection department before finalizing your upgrade design. Some utilities have queue timelines of several weeks for approval, and knowing this early prevents project delays after installation is already complete.
Now that you understand the legal groundwork necessary, let’s explore what technical components you can upgrade to maximize system performance.
Key components to upgrade: Inverters, panels, and battery storage options
Not every upgrade project looks the same. Some homeowners need more generation capacity. Others need better battery integration or restored monitoring that stopped working after a carrier network shutdown. A practical upgrade path typically includes one or more of these core components: inverters, additional panels, and battery storage with updated monitoring.
Here is a breakdown of the main upgrade options:
| Component | Primary benefit | Key consideration |
|---|---|---|
| Microinverters | Per-panel efficiency, extended warranty | Must be compatible with existing wiring |
| Solar panels (added) | More generation capacity | Roof space and inverter capacity must support additions |
| Battery storage | Backup power, load shifting | Requires utility approval; may qualify for incentives |
| Communications hardware | Restored cloud monitoring | Critical if older 3G devices have lost connectivity |
Microinverters are among the most impactful upgrades available for older systems. Newer models offer better efficiency ratings, improved shade tolerance, and warranties that often restart upon replacement. If your system uses string inverters, switching to microinverters also reduces single-point failure risk.
Adding solar panels increases your system’s total generation, but this only makes sense if your current inverter has unused capacity and your roof can structurally support additional weight. A site assessment will confirm both.
Battery storage is increasingly relevant for homeowners in the Northwest, where grid reliability has become a concern. Adding storage lets you capture excess daytime generation and use it during evening hours or outages. Explore home battery backup options to see what systems pair well with existing solar setups.
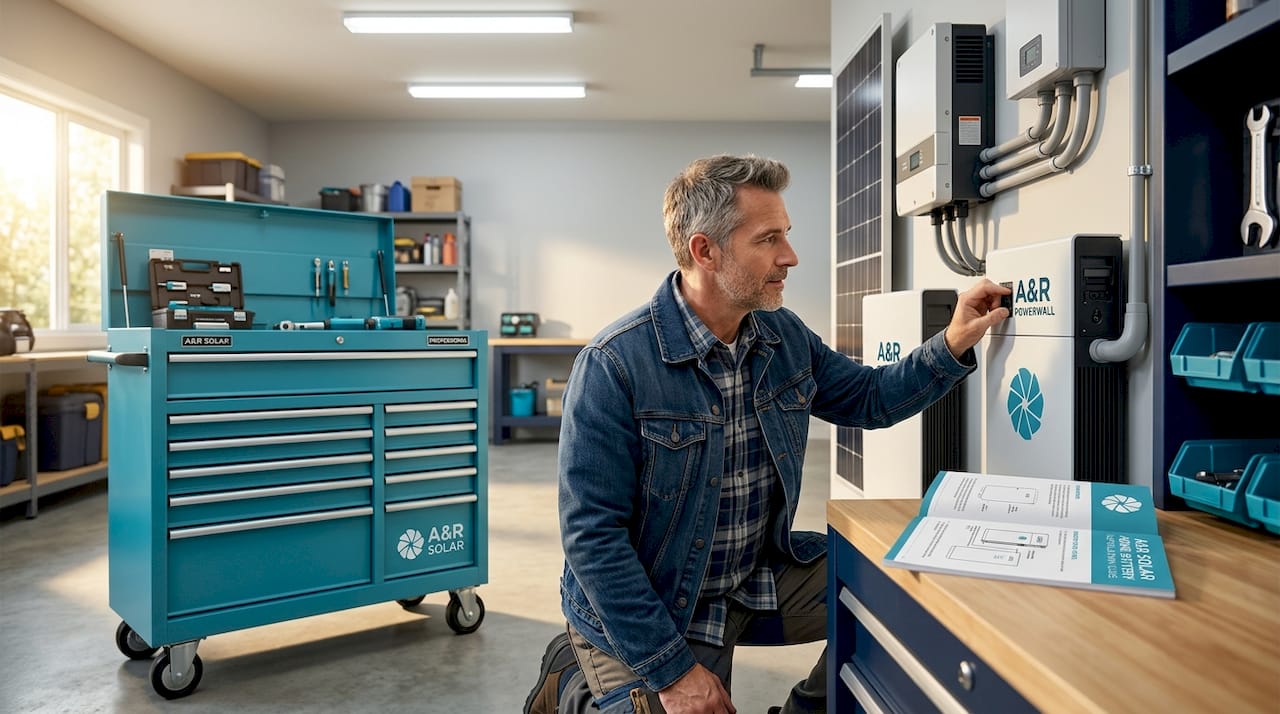
Pro Tip: If you are upgrading microinverters, confirm whether your communications gateway (the device that connects your system to the cloud) also needs replacement. Many older gateways relied on AT&T’s 3G network, which was shut down in 2022, meaning your monitoring may have quietly stopped working without any visible error on the panels themselves.
With the upgrade options clear, next we’ll look at how to prepare your property and documentation to ensure a smooth upgrade process.
Preparing for your solar panel upgrade: Site assessment, documentation, and choosing contractors
Preparation determines how smoothly the actual upgrade goes. Homeowners who skip the assessment phase often run into surprises during installation that cause delays, added costs, or failed inspections.
Start with a professional site assessment. This covers:
- Current system output versus original design specifications
- Roof condition and remaining structural capacity
- Shading changes from trees or nearby construction since original installation
- Inverter compatibility with new panels or battery systems
- Existing wiring gauge and condition
Once the assessment is complete, you will need to gather documentation for the permit application. Applying for permits online is now standard in most Oregon and Washington jurisdictions, and complete documentation significantly reduces review delays. Required documents typically include:
- Updated system design drawings or single-line diagrams
- Equipment spec sheets for all new components
- Contractor’s license number and proof of insurance
- Interconnection application (submitted to your utility)
- Structural engineering letter if roof modifications are involved
Choosing the right contractor is not just about price. Look for installers who are familiar with your specific utility’s interconnection process, whether that is PGE, Pacific Power, PSE, or another provider. Contractors who have completed multiple upgrades in your county will know which permit pathways (prescriptive versus engineered) apply to your project’s complexity.
Checking available Oregon solar incentives and Washington solar incentives before finalizing your contractor can also help you select a contractor approved for incentive programs, which can reduce out-of-pocket costs substantially.
Now that your preparations are set, let’s review how to execute the upgrade effectively, including typical steps and what to expect.
Executing your solar upgrade: Installation steps, inspections, and activation
Installation cannot begin until permits are in hand. This is both a legal requirement and a practical safeguard. Work performed before permit approval can result in failed inspections, required removal of equipment, or voided warranties.
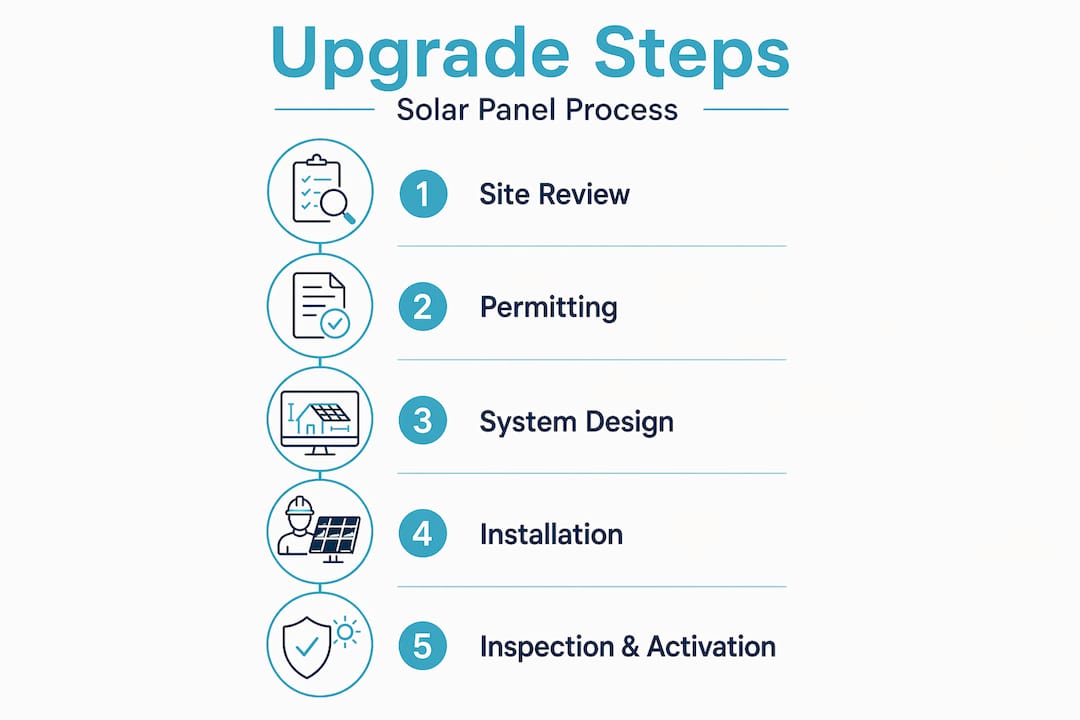
Here is the typical sequence of an upgrade installation:
- Permit approval received from local jurisdiction and utility
- Equipment delivery and staging at the property
- Existing system de-energized by a licensed electrician before any work begins
- New components installed according to the approved system design drawings
- Electrical connections made and inspected for code compliance
- Local inspection scheduled for structural and electrical sign-off
- Utility final inspection and Permission to Operate (PTO) issued
- System re-energized and monitoring confirmed active
After permits and installation, inspections verify safety and code compliance before Permission to Operate is granted. Utility inspections are also part of the process for safe grid interconnection, confirming your upgraded system meets all reliability standards before you begin exporting power.
The PTO step is where many homeowners get frustrated. Utilities have their own inspection schedules, and waits of one to three weeks after installation are not unusual. Net metering credits do not begin until PTO is issued, so anything you can do to accelerate this step is worth the effort.
Pro Tip: Prepare for possible inspection delays by scheduling the local building inspection the same week installation is completed. The sooner you clear the local sign-off, the sooner the utility can proceed with its own review.
Once installation is complete and your system is operational, we’ll explore how to verify performance and monitor your upgraded solar system effectively.
Verifying performance and optimizing your upgraded solar system
An upgraded system is only as valuable as what you can measure. Without reliable monitoring, you may not realize if a panel or inverter is underperforming until you see an unexpectedly high utility bill months later.
Modern systems now offer cloud-based portals and smartphone apps that show real-time production data at the panel level. Upgrading microinverters and communications devices restores cloud monitoring, resets warranty coverage, and enables features like remote diagnostics and app-level alerts that older systems simply cannot access.
Key things to monitor after your upgrade:
- Daily production totals compared to expected output for your region and system size
- Panel-level performance to catch early signs of shading or equipment issues
- Battery state of charge and charge/discharge cycles if storage was added
- Export to grid versus self-consumption, particularly relevant if you are optimizing for net metering credits
Check your solar system monitoring portal at least once a week during the first few months after upgrade. Discrepancies of more than 10 to 15 percent below expected output warrant a call to your installer.
Pro Tip: Upgrade your communications hardware early in the process, even if it is not your primary reason for the upgrade. Many homeowners discover their monitoring has been offline for months or years due to 3G network shutdowns. Restoring visibility into your system is one of the highest-value steps you can take before anything else.
With your system verified and optimized, let’s discuss a fresh perspective on why upgrading your solar system can be a pivotal decision for Northwest homeowners.
Why upgrading your solar panel system is a smart investment beyond just adding panels
Most articles about solar upgrades focus on panel efficiency numbers and payback periods. That is useful, but it misses a larger point that experience in this region consistently reinforces.
The homeowners who get the most from an upgrade are not the ones who simply add more panels. They are the ones who treat the upgrade as a full system modernization. That means updating communications hardware, replacing aging inverters with current-generation equipment, and integrating storage at the same time. All of this matters because upgrading often involves modernizing both power conversion and system communications to ensure long-term functionality and ongoing monitoring.
Here is what often gets overlooked: an older system that has lost monitoring capability due to a 3G shutdown has essentially been flying blind. Homeowners have no visibility into whether panels are producing at capacity, whether there are wiring degradation issues, or whether they are losing net metering credits due to system faults. Restoring that visibility alone can improve effective system performance without replacing a single panel.
State and utility requirements in Oregon and Washington also matter beyond just compliance. They are designed to ensure your upgraded system integrates safely and reliably with the grid. That reliability directly affects whether your system earns full net metering value over its lifespan. Explore the Oregon solar incentives available for integrated upgrade projects, because pairing battery storage with inverter upgrades can unlock incentive tiers that individual upgrades do not qualify for.
The bottom line: a solar upgrade done right positions your home’s energy system for the next 15 to 20 years, not just the next billing cycle.
Get expert help upgrading your solar system with A&R Solar
Planning a solar upgrade involves more moving parts than most homeowners expect, from permit applications and utility interconnection timelines to equipment compatibility and incentive eligibility. A&R Solar has been helping Washington and Oregon homeowners navigate exactly this process for two decades, as a local, employee-owned, B Corporation-certified company.
Their team handles the full upgrade process: permit preparation, contractor coordination, microinverter and panel additions, and home battery backup solutions that align with Oregon and Washington incentive programs. They also provide ongoing monitoring support after installation, so your upgraded system continues delivering the performance you paid for. Browse their residential solar projects to see what completed upgrades look like in practice, or reach out directly to their solar repair and service team in Oregon if your existing system needs assessment first. By working with professionals who understand local utility requirements inside and out, you avoid the delays and compliance issues that slow down DIY or under-qualified upgrade attempts.
Frequently asked questions
Do I need new permits to upgrade my existing solar panels in Oregon?
Yes, Oregon requires both structural and electrical permits for solar upgrades before installation can legally begin. Skipping permits risks failed inspections and potential removal of installed equipment.
How does Washington’s net metering law affect solar panel upgrades?
Washington limits net metering systems to 100 kW, so your upgraded system’s total capacity must stay within this threshold to remain eligible for utility billing credits under RCW 80.60.
Can I add battery storage when upgrading my solar system in Oregon?
Yes, and it may be worth doing so during the upgrade rather than separately. Energy Trust offers increased incentives for solar-plus-storage projects in Oregon, which can lower the total cost when combined with other upgrade work.
Why is upgrading microinverters important for older solar systems?
Older microinverters often lack app-level monitoring and may no longer be under warranty. Upgrading microinverters updates the technology, restores warranty coverage, and enables modern monitoring features that older hardware simply cannot support.
What should I check before upgrading to avoid monitoring issues?
Confirm your system’s communication device uses 4G LTE or Wi-Fi rather than 3G. The AT&T 3G shutdown in 2022 disconnected many older monitoring gateways, meaning some homeowners have had no visibility into their system’s output for years without realizing it.