

TL;DR:
- Cleaning solar panels regularly restores their efficiency by removing dust, pollen, and other dirt that cause energy loss. Proper techniques and timing, such as gentle rinsing and cleaning during cooler hours, prevent damage and micro-cracks, ensuring long-term performance. Monitoring inverter output before and after cleaning helps optimize maintenance schedules and confirms cleaning effectiveness.
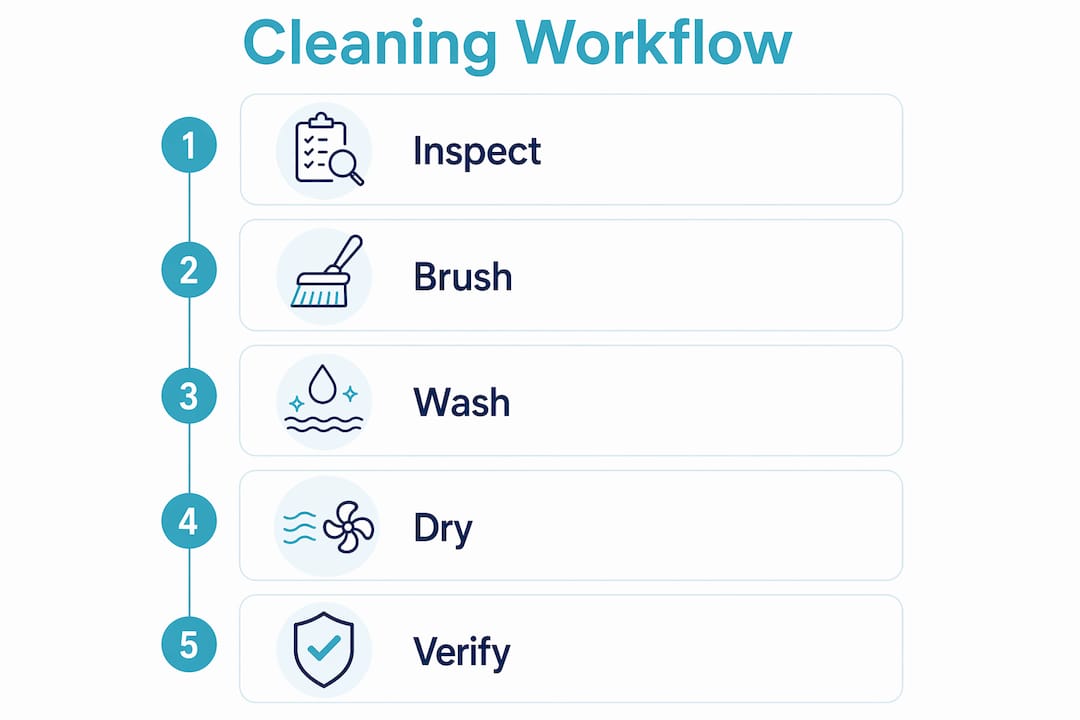
A structured solar panel cleaning workflow is defined as the sequential process of inspecting, brushing, washing, and verifying solar panels to recover lost energy output and protect panel coatings. Dirty solar panels lose between 15% and 25% of their efficiency due to pollen and dust, with heavy soiling pushing losses past 30%. That means a $20,000 residential system in Washington or Oregon could be quietly underperforming by thousands of kilowatt-hours each year. The good news: a disciplined cleaning routine, done correctly and safely, restores that output without expensive service calls. This guide covers every step, from the tools you need to how you verify results.
What tools and preparations you need for solar panel cleaning
The right equipment makes the difference between a safe, effective clean and a panel surface that is scratched or cracked. The core toolkit for residential cleaning includes a soft-bristle brush, a garden hose with a gentle spray nozzle, a pH-neutral or mild dish soap, and a microfiber cloth for finishing. For rooftop systems, a ladder stabilizer and a roof harness rated for your pitch are non-negotiable safety items.
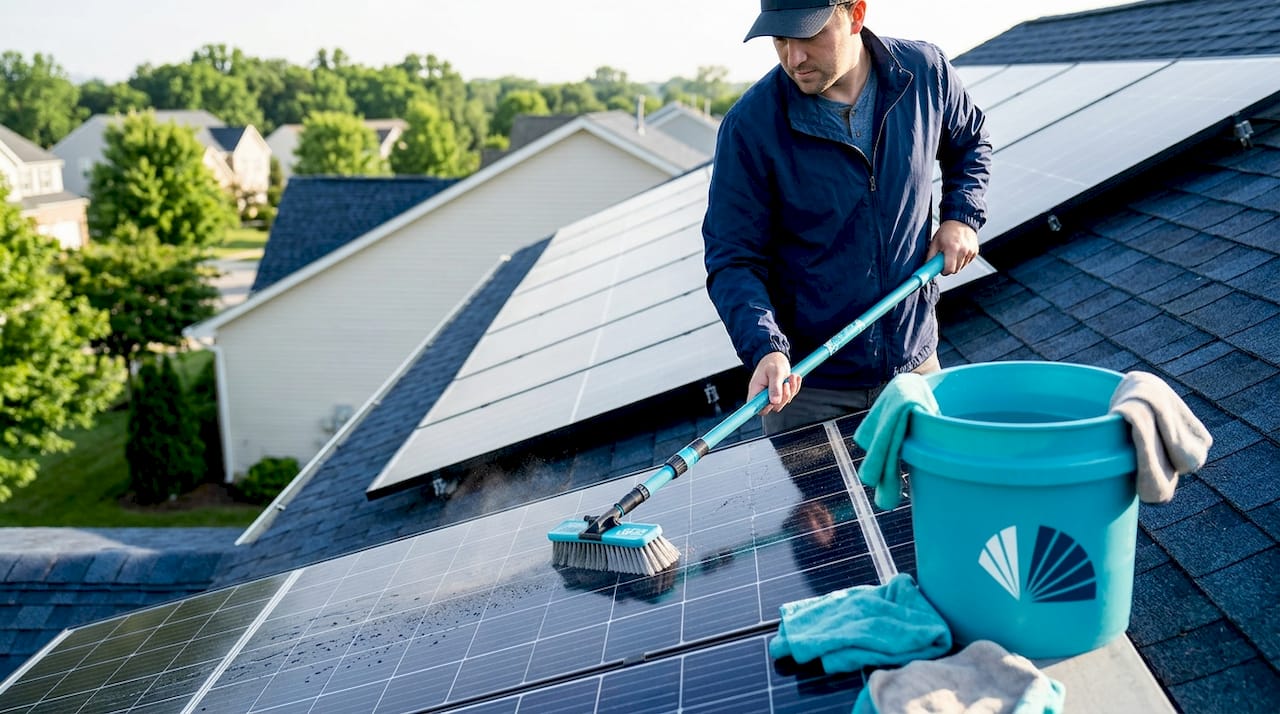
Timing matters as much as tools. Cleaning during cooler morning or late evening hours avoids thermal shock, which occurs when cold water hits glass that has been heated to 100°F or more by direct sun. Thermal shock can cause micro-cracks in the glass that are invisible to the eye but degrade performance over time. Morning cleaning has an added benefit: overnight dew softens surface grime, reducing the scrubbing force needed to lift deposits without streaking.
Pro Tip: Before you climb onto the roof, open your inverter monitoring app, such as SolarEdge, Enphase Enlighten, or SMA Sunny Portal, and note your current output reading. This gives you a concrete baseline to compare against after cleaning, so you can quantify exactly how much efficiency you recovered.
| Tool | Estimated cost | Primary use |
|---|---|---|
| Soft-bristle brush (telescoping) | $15 to $40 | Dry debris removal from ground level |
| Garden hose with spray nozzle | $10 to $25 | Gentle rinsing top to bottom |
| pH-neutral dish soap | $3 to $8 | Removing stubborn organic deposits |
| Microfiber cloth | $5 to $15 | Spot cleaning and final wipe |
| Ladder stabilizer | $30 to $60 | Safe roof access |
| Roof harness kit | $50 to $120 | Fall protection on steep pitches |
Step-by-step solar panel cleaning workflow for homeowners
This is the core of any effective maintenance routine. Follow these steps in order. Skipping steps or reversing the sequence can spread contaminants or leave residue that bakes onto the glass.
- Shut down the system. Use your inverter’s shutdown procedure or follow the manufacturer’s safety protocol. Never clean an energized system.
- Dry brush loose debris. Use a soft-bristle brush to sweep off leaves, dust, and loose pollen. Work from the top of the panel downward so debris falls away from already-cleaned areas.
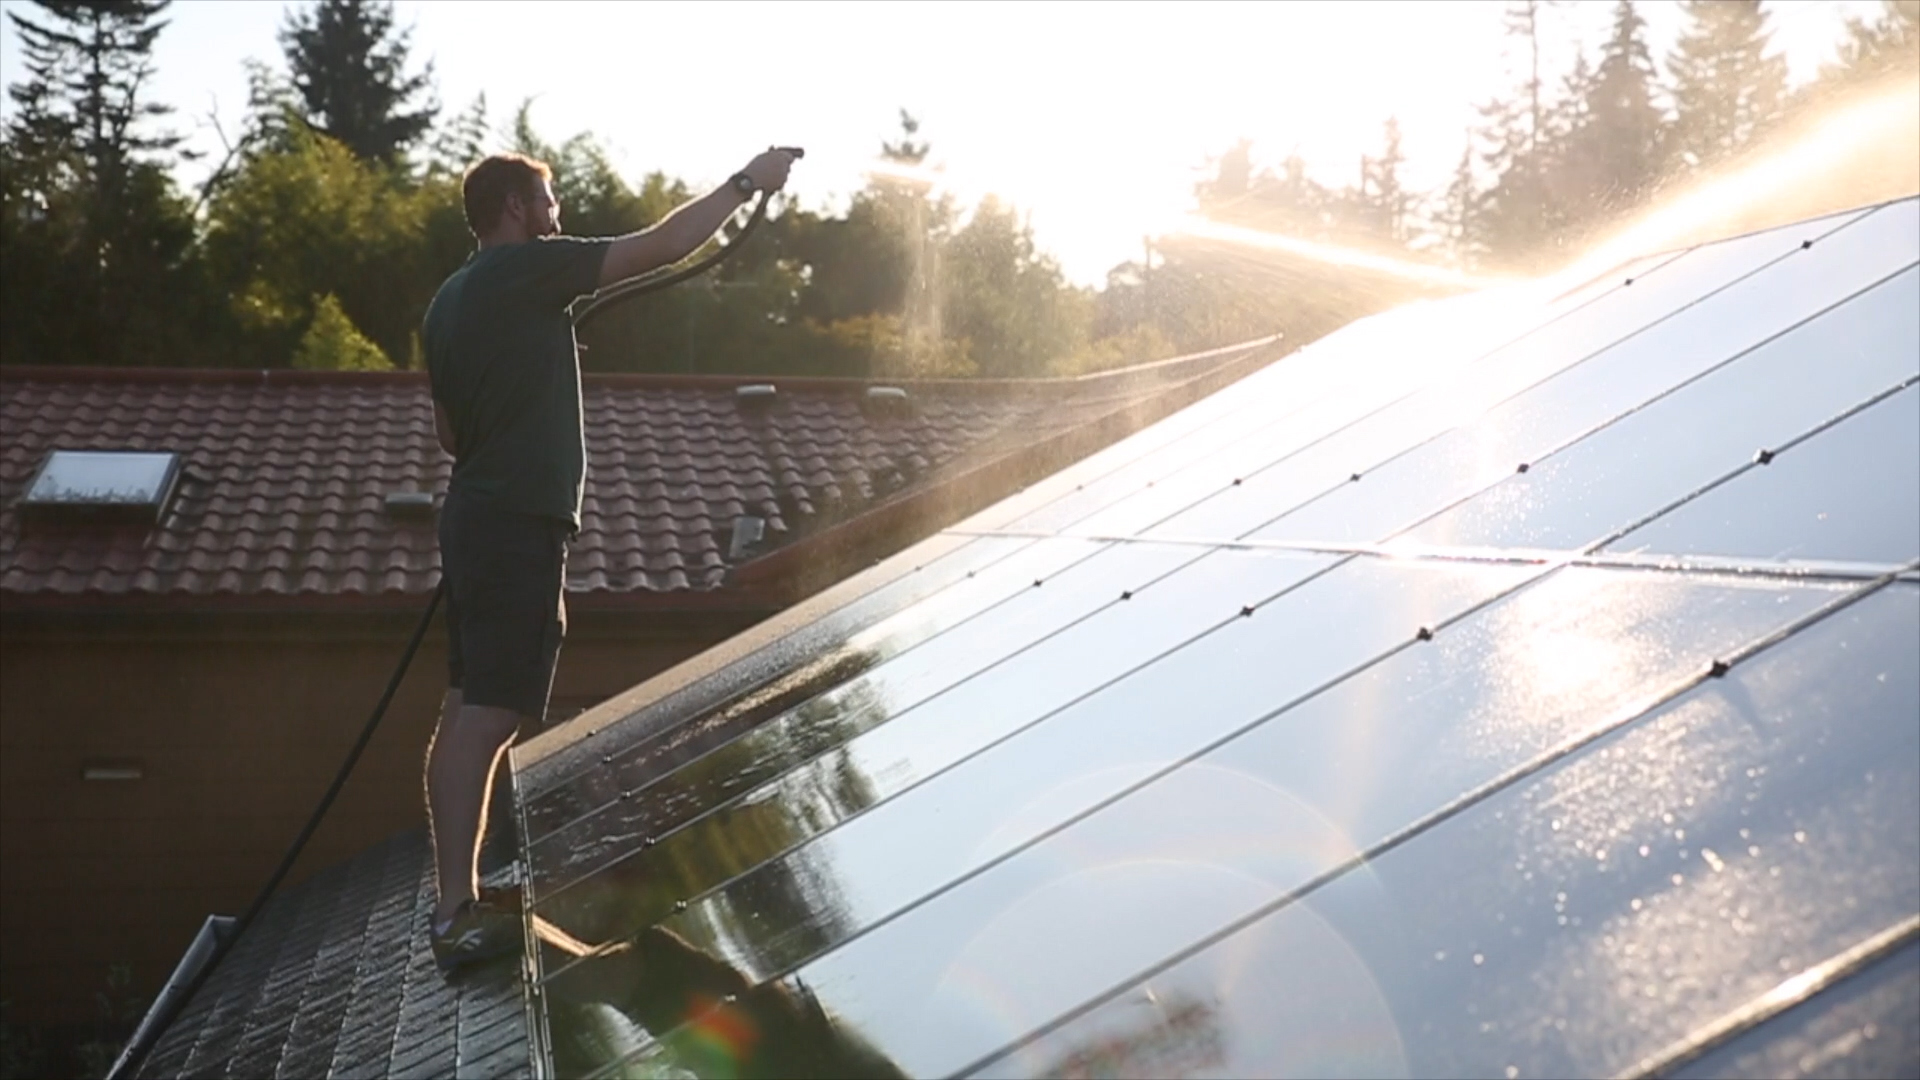
- Pre-rinse with a gentle hose spray. Start at the top and work down. Keep the nozzle at least 12 inches from the glass surface. This removes the bulk of surface dirt before any soap is applied.
- Treat stubborn spots. Mix a small amount of pH-neutral dish soap into a bucket of water. Apply with a microfiber cloth or soft sponge. For bird droppings specifically, soak with a damp cloth for 60 seconds and then lift in one clean swipe. This prevents the corrosive uric acid in droppings from being spread across the glass coating.
- Rinse thoroughly. Use clean water to rinse all soap residue from top to bottom. Soap left on the surface attracts more dust and can degrade the anti-reflective coating over repeated cleanings.
- Address hard water risk. If your tap water has a total dissolved solids (TDS) level above 50 ppm, calcium carbonate deposits will form as the water evaporates. Use deionized or distilled water for the final rinse, or follow immediately with a squeegee to remove standing water before it dries.
- Avoid junction boxes. Keep water spray directed at the glass surface only. Spraying near junction boxes and cable connectors risks moisture ingress that causes electrical corrosion, which is a repair that costs far more than a professional cleaning visit.
- Air dry or squeegee. Let panels air dry in shade, or use a clean rubber squeegee for a streak-free finish. Do not use paper towels or rough cloths, as both can scratch the glass.
Pro Tip: Place a dry microfiber cloth flat against a bird dropping before wetting it. The cloth absorbs the outer layer of the deposit first, so when you add water and lift, you are not dragging the uric acid residue across the panel surface.
Pressure washers are not part of this workflow. Pressure washers damage the anti-reflective coating and can force moisture into electrical components, voiding most manufacturer warranties. More pressure does not mean a better clean. Gentle rinsing is the correct method for maintaining delicate panel surfaces.
Common mistakes that damage panels or reduce cleaning results
Most cleaning errors fall into one of three categories: wrong tools, wrong timing, or wrong technique. Knowing what to avoid protects both your panels and your warranty.
- Using a pressure washer. This is the single most damaging mistake a homeowner can make. Even a low-pressure setting can strip the anti-reflective coating and push water into sealed electrical components.
- Cleaning in midday heat. Hot glass and cold water create thermal shock. Most homeowners underestimate this risk, but strictly following recommended cleaning timing is critical to avoiding micro-cracks and long-term corrosion.
- Circular scrubbing of bird droppings. Rubbing in circles spreads corrosive residue across a larger area of the glass coating. Always soak first, then lift in a single direction.
- Walking on panels. Solar panels are not rated for foot traffic. Walking on them causes internal cell fractures that do not show up immediately but reduce output over months.
- Ignoring hard water deposits. Leaving tap water to evaporate on the glass surface builds up mineral deposits that become progressively harder to remove without abrasive tools.
- Skipping the post-clean check. If output does not improve after cleaning, the cause may be shading from new tree growth, a failing inverter, or a degraded cell rather than surface dirt.
“Proper cleaning is not only about removing dirt but also about preserving the anti-reflective coating, which can never be repaired once damaged.” — Solar panel maintenance and care
If you notice persistent output issues after a thorough clean, check your inverter error codes before assuming the panels need replacement. Many performance problems in Washington and Oregon systems trace back to inverter faults or shading changes rather than soiling.
How to verify cleaning success and plan ongoing maintenance
Verification is the step most homeowners skip, and it is the step that turns a one-time chore into a data-driven maintenance practice. Open your inverter monitoring app immediately after cleaning and compare current output to the baseline you recorded before you started. A well-cleaned system on a soiled panel set typically shows a performance increase of 5% to 25%, depending on how heavily soiled the panels were before cleaning.
Ongoing cleaning frequency depends on your local environment. The general guidance from industry professionals is clear:
- Standard residential systems: Clean one to two times per year, typically in spring after pollen season and in fall before winter.
- Dusty or agricultural areas: Clean every two to three months. Farms, gravel roads, and construction zones deposit far more particulate matter than suburban neighborhoods.
- Coastal Pacific Northwest locations: Salt spray from ocean air accelerates mineral buildup. Quarterly cleaning is advisable for homes within a few miles of the coast.
- Under tree canopy: If your panels sit below or near deciduous trees, clean more frequently in the PNW due to sap, pollen, and leaf debris accumulation.
Documenting your results is worth the two minutes it takes. Record the date, pre-clean output reading, post-clean output reading, and any observations about soiling type. Over two or three cleaning cycles, this log tells you exactly how much energy loss you are recovering and whether your current schedule is frequent enough.
| Maintenance task | Recommended frequency |
|---|---|
| Visual inspection | Monthly |
| Full cleaning cycle | 1 to 2 times per year (standard) |
| Cleaning in dusty or coastal zones | Every 2 to 3 months |
| Professional inspection | Annually |
| Inverter performance review | After each cleaning |
For systems on steep roofs or multi-story homes, professional cleaning is the safer and often more cost-effective choice. The cost of solar panel cleaning by a certified technician typically ranges from $100 to $300 for a residential system, which is a fraction of the energy value recovered over a full year.
Key takeaways
A consistent solar panel cleaning workflow recovers 15% to 30% of lost efficiency, protects irreplaceable anti-reflective coatings, and extends the productive life of your system.
| Point | Details |
|---|---|
| Efficiency loss from soiling | Dirty panels lose 15% to 30% of output; cleaning directly recovers that production. |
| Timing protects panels | Clean in early morning or late evening to prevent thermal shock and micro-cracks. |
| Technique over pressure | Gentle rinsing and the soak-and-lift method outperform any high-pressure approach. |
| Hard water is a hidden risk | Use deionized water or a squeegee after rinsing if your tap water TDS exceeds 50 ppm. |
| Verify with monitoring data | Compare inverter output before and after cleaning to confirm results and schedule future sessions. |
Why I think most homeowners are cleaning their panels wrong
I have reviewed dozens of residential solar systems across Washington and Oregon, and the pattern is consistent. Homeowners who clean their panels are doing better than those who do not, but a surprising number are still using the wrong tools or the wrong timing and quietly damaging the very surfaces they are trying to protect.
The most common misconception I encounter is that solar panels are rugged and self-maintaining. They are not. The anti-reflective coating on a modern panel is a precision-engineered surface that cannot be repaired once scratched or chemically degraded. One session with an abrasive sponge or a pressure washer can cause permanent efficiency loss that no amount of future cleaning will fix.
What I have found actually works is treating the cleaning workflow as a scheduled system check, not a reactive chore. Homeowners who log their inverter readings before and after each clean, and who adjust their frequency based on real output data rather than guesswork, consistently get more value from their systems. They also catch inverter faults and shading issues early, because they are paying attention to the numbers.
The technology side is also moving fast. Research from Imperial College London shows that optimized cleaning methods can remove up to 99.9% of contaminants using only 10% of the water required by conventional rinsing. That is the direction the industry is heading. For now, the soft-bristle brush and deionized water rinse remain the practical standard for most homeowners. But the principle behind that research, using less force and less water to achieve better results, is exactly what good manual technique already reflects.
My advice: commit to the workflow, document your results, and do not cut corners on safety. The panels on your roof represent a long-term investment. Treat the cleaning process with the same care you would give any other major home system.
— Shyerome
Professional cleaning and maintenance from A-rsolar
For homeowners with steep roofs, multi-story systems, or panels that have not been cleaned in several years, professional service is the right call. A-rsolar’s certified technicians follow strict isolation and safety protocols, use deionized water systems, and document pre-clean and post-clean output for every job. You get the efficiency recovery without the roof access risk.
A-rsolar has served residential customers across Washington and Oregon for two decades as a local, employee-owned, B Corporation-certified company. Whether you need a one-time deep clean or an annual solar maintenance plan, the team brings the same standards to every system. See how A-rsolar approaches residential solar projects and what that level of care looks like in practice.
FAQ
How often should I clean my solar panels?
Experts recommend cleaning residential panels one to two times per year in standard conditions, and every two to three months in dusty, agricultural, or coastal environments. Your inverter monitoring data is the most reliable guide for adjusting that schedule.
Can I use a pressure washer on solar panels?
No. Pressure washers damage the anti-reflective coating and force moisture into electrical components, which voids most manufacturer warranties. A garden hose with a gentle spray nozzle is the correct tool.
What time of day is best for cleaning solar panels?
Early morning or late evening is best. Cleaning hot panels with cold water causes thermal shock, which can create micro-cracks in the glass that reduce output over time.
What should I do if output does not improve after cleaning?
Check your inverter for error codes and review shading from nearby trees or new structures. Persistent low output after a thorough clean often points to an inverter fault or cell degradation rather than surface soiling.
How do I prevent hard water stains on my panels?
If your tap water TDS exceeds 50 ppm, finish with a deionized or distilled water rinse, or use a rubber squeegee immediately after rinsing to remove standing water before it evaporates and leaves mineral deposits.